Quick Updates: DIY Projects
Start the new year with DIY projects to feel accomplished and creative.
D.I.Y. Home
Take a Stab at Updating
Your Life, D.I.Y. Style
The New Year Comes with Resolutions—make Learning Something New Part of Your “Must-do” List.
To Help You Get Started, We Called on Our Favorite D.I.Y. Bloggers at
Limited Batch, Who Can
Turn Your Shack Into D.I.Y. Chic, in No Time Flat.
DIY Spiced Bourbon
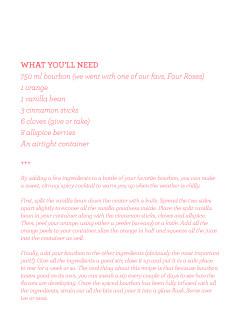
750 ml bourbon (we went with one of our favs, Four Roses) 1 orange 1 vanilla bean 3 cinnamon sticks 6 cloves (give or take)
8 Allspice Berries an Airtight Container
By adding a few ingredients to a bottle of your favorite bourbon, you can make a sweet, citrusy, spicy cocktail to warm you up when the weather is chilly.
First, split the vanilla bean down the center with a knife. Spread the two sides apart slightly to expose all the vanilla goodness inside. Place the split vanilla bean in your container along with the cinnamon sticks, cloves and allspice. Then, peel your orange, using either a peeler (so easy) or a knife. Add all the orange peels to your container, slice the orange in half and squeeze all the juice into the container as well.
Finally, add your bourbon to the other ingredients (obviously the most important part!). Give all the ingredients a good stir, close it up and put it in a safe place to rest for a week or so. The cool thing about this recipe is that because bourbon tastes good on its own, you can sneak a sip every couple of days to see how the flavors are developing. Once the spiced bourbon has been fully infused with all the ingredients, strain out all the bits and pour it into a glass flask. Serve over ice or neat.
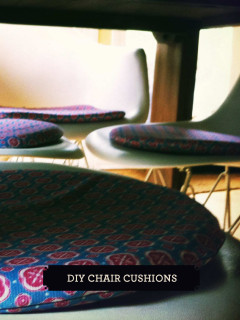
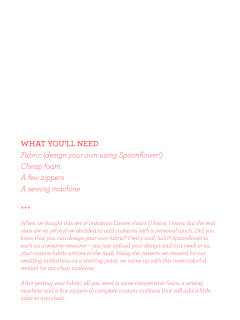
DIY Chair Cushions Fabric (Design Your Own Using Spoonflower!) Cheap Foam a Few Zippers a Sewing Machine
When we bought this set of imitation Eames chairs (I know, I know, but the real ones are so pricey) we decided to add cushions with a personal touch. Did you know that you can design your own fabric? Pretty cool, huh?! Spoonflower is such an awesome resource – you just upload your design and in a week or so, your custom fabric arrives in the mail. Using the pattern we created for our wedding invitations as a starting point, we came up with this more colorful version for our chair cushions.
After getting your fabric, all you need is some inexpensive foam, a sewing machine and a few zippers to complete custom cushions that will add a little color to any chair.
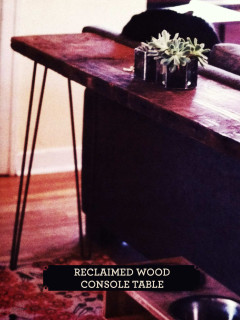
Reclaimed Wood Console Table A Piece of Reclaimed Wood 4 Hairpin Legs Some Screws and a Drill
One of the best things about living here in Portland is the access we have to cool (and fairly affordable) materials. In addition to a seemingly endless circuit of vintage furniture stores, we’ve also discovered some great resources like The Rebuilding
Center and Salvage Works. We’ve really taken advantage of these spots while furnishing our new place and will continue to frequent them for future projects. Once we set up all our furniture, it became clear we needed a console table to put behind the couch, and we decided to try and make one ourselves. We took a trip to Salvage Works and were able to pick out the wood we liked – doug fir salvaged from an old barn - a 12ft board cost us just under $50.
After a bit of research, we found hairpin legs online - they can be really expensive, and purchasing them online saved us quite a bit of money. We cut the board to the perfect length for our space and after adding a couple screws, we had an awesome rustic piece for behind the couch (and the perfect home for our vintage glass terrarium duo).
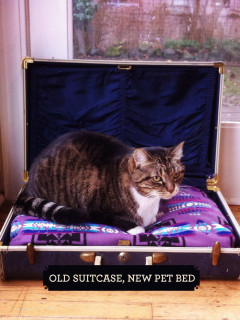
Old Suitcase, New Pet Bed
A old suitcase (the more vintage character is has the better) A pillow insert to fit Some cool, durable fabric A sewing machine
Cats can turn almost anywhere into the perfect place for a long nap – in the past week, we’ve spotted our two cats sleeping on top of the washing machine, in a basket in the back of the closet and inside an empty cabinet in the kitchen. So when we came across a cool old suitcase at a flea market, we thought... cat bed? Sure, why not.
After taking some measurements, we took a trip to the Pendleton store to choose some fabric. We also picked up a pillow insert at a local fabric store since we wanted the cover to be removable and washable. For this suitcase, a 14”x22” insert fit perfectly.
Aonce you’ve gathered all your materials, its time to get to sewing. Fold your fabric in half so it is doubled, and using your insert as a guide, trim it to the appropriate size, leaving about an inch of excess fabric on each side. We also left the fabric a bit longer than needed to create a flap for removing the insert. Make sure your fabric is inside out (the desired pattern should be facing in) and then pin it together so it stays put while you sew. Using a sewing machine, stich each side of your pillow cover. Then flip it inside-out so the correct side of the fabric is now on the outside. Attach snaps to the flap so that it can easily be opened and closed to remove the insert. Fit the pillow into the base of the suitcase and find a cat to enjoy it. Our cats took to it right away... the down pillow and soft wool make it the perfect place for a cat nap.
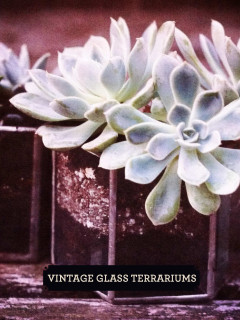
Vintage Glass Terrariums Glass Containers Potting Soil Succulents
When we purchased these two vintage glass containers, they seemed like the perfect home for a couple of succulent plants. This project took 10 minutes tops - just gather all your supplies, add a couple handfuls of potting soil to each container and replant the succulents. You can also make it fun by adding a mini elf and deer - we found these at Collage, a craft store in our neighborhood.